What are Csound and Cabbage?

Csound is a computer music composition system. It turns 30 this year (2016), which makes it a veteran in technology terms: 1986 was the year of the Nintendo Entertainment System, if that helps. It predates the 486 processor, the World Wide Web, Linux, SMS, Java, and mobile phones smaller than a brick. But Csound has continued to evolve, and is still in active development and use. Although it’s named after the C programming language, that’s because it’s made with C, not because it resembles C. You’ll be glad to hear it’s easier than C, too. Csound can be used on its own to generate pieces of music, or with other music software.
Cabbage is a friendly Csound editor which packages Csound instruments and effects into stand-alone programs or plugins. A plugin is what you need in order to use your synth (or effect) in a digital audio workstation (DAW) program, such as Cubase, Sonar, Ableton Live or (my favourite) Tracktion.
In this tutorial, I’ll show you how to use Cabbage to create a software synthesizer which sounds like this:
First steps
Download and install Cabbage. For Windows, there are 32-bit and 64-bit versions, and which one to choose depends on the host where you want to use your instruments. If you run a 64-bit DAW, then choose Cabbage64 (with the black headphones on the logo). If you use 32-bit, which is more likely, then choose Cabbage32 (with the white headphones). You might want to install both. Go on, it’s free. It’s trivial to convert a plugin from one to the other, so choosing the wrong one doesn’t matter much.
For Mac, there’s only one version, and for Linux you may have to compile it yourself. These instructions are based on the Windows version, but should work on any of them.
Once it’s installed and started up, click the Options button, and choose New Cabbage… Instrument. You’re prompted to give it a name. As you may know, naming things is one of the hardest two problems in computer science. Choose the right names for a few things, and your program’s practically written itself. So call it BasicSynth, or call it FlyingBanana or Crubulator or ChunkyBacon if you think that’s a better idea. But don’t say I didn’t warn you.
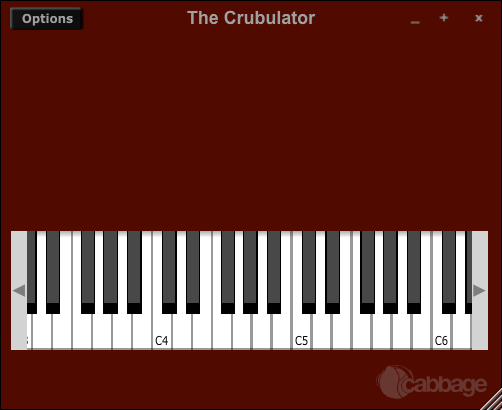
Cabbage doesn’t leave you staring at a blank page. You should see two windows appear: one with code, and a blue one with a keyboard on it. You’ve already clicked it, right? It buzzed! Yes, you’ve already made a synth just by naming a new project. Well done, tutorial over.
But wait…
OK, this synth is sort of weak. Let’s make it better.
If you’re anything like me, the first thing you do with any new program is dive into the options and tweak the colours. In fact, I’m a little disappointed when a program looks really nice out of the box. I’ll leave you to play with the Cabbage editor styles on your own, but first let’s make this synth our own.
At the top of the code window is the special <Cabbage> section. Update the bit that says form caption("Untitled") to a more inspiring name, like form caption("The Crubulator"). There’s also pluginID("def1") - change “def1” to something else, but keep it four characters long. It has to be four, for some reason. Then you have size(400, 300), which will do for now, and colour(58, 110, 182), which certainly will not. It’s refreshing for us British English speakers that there’s a u in colour, but the system is the same as everywhere else: three numbers from 0 to 255, representing the proportion of red, green and blue you want. I’ve gone for a deep red, colour(80, 10, 0). Press ctrl+s to save, and you’ll see the synth window update.
Guts
I think you’ll agree that it sounds better already. But let’s get to the actual sound-generating guts of it and really make this baby crubulate. Further down the code window, find the comment (a line starting with a semicolon) ;instrument will be triggered by keyboard widget. Under that, between instr 1 and endin, is the definition of the instrument.
instr 1
kEnv madsr .1, .2, .6, .4
aOut vco2 p5, p4
outs aOut*kEnv, aOut*kEnv
endin
These are the underdeveloped guts of our nascent crubulator. All we have here is an ADSR envelope, madsr, controlling the volume of an oscillator, vco2, which is routed to the two output channels, outs. Those three keywords show up in blue (or whatever colour you’ve tweaked them to), because they’re opcodes. Opcodes are the building blocks of Csound. If you’re a programmer, they’re like functions. If you’re a musician, they’re like basic synth modules and effects that you can plug together.
Let’s take a closer look at the first one. It starts with kEnv, which is a new variable to accept the output of the rest of the line. (If you use guitar effects pedals, you’ll know that the output jack is conventionally on the left, like this. kEnv is your patch cable plugged into the output.). Then the opcode, madsr, and then four numbers, the parameters, which are the four knobs on your pedal. There’s no input jack on this one, since it just outputs a control signal. To find out what an opcode does, click on it and press f1. The official Csound documentation is rather dry, but honest. The page for madsr contains the heartening phrase ‘not yet properly tested’, which should probably be on most pages of most software manuals. It also tells you that, as you might expect if you’ve ever used a synth before, the four numbers after the opcode control the attack time, decay time, sustain level and release time of the envelope. (The m is for MIDI compatible.)
The next line starts with aOut, which is the output again. This one starts with a because it’s an audio signal, whereas kEnv starts with k because it’s a control (Kontrol) signal. This is actually important - unlike most sane programming languages, you can’t name variables however you want in Csound, because the first letter of a variable’s name defines its type. Then the opcode, vco2. The term VCO will be familiar to synth players, though knowing it stands for ‘Voltage Controlled Oscillator’ won’t help you much. It generates a raw tone. This time, instead of actual numbers controlling it, we have p4 and p5. These beauties are the keyboard input. If you look near the top of the file, at the <CsOptions> section that you’re glad you didn’t have to write, you can see the frequency and amplitude being wired up to the numbers 4 and 5: --midi-key-cps=4 --midi-velocity-amp=5. (By the way, the note velocity / amplitude on the Cabbage keyboard is controlled by the vertical position of your click.)
The third and final line of the guts starts with the opcode outs, which has no output (it is the output), and two inputs, both of which are aOut*kEnv - the raw tone output of the oscillator ‘multiplied by’ the control signal from the envelope. It may seem weird to change the volume of a sound using the multiplication operator, but music is math, man. Or music are maths. Or something. The oscillator is producing a signal that varies quickly between -1 and 1 (say 440 times a second, if you hit the middle A on the keyboard), and the envelope is producing a signal that varies slowly between 0 and 1, and at each point in time the output requires a new value (44100 times a second, depending on your audio settings) it does the multiplication, and sends that number to the left and right channels. (And eventually that number gets converted to an actual analogue voltage and sent to your speakers or headphones.)
Knobs
Every good synth deserves knobs. Let’s add one.
Add two parameters to the vco2 line. Remembering to put commas between them, add 2 and kPulsewidth. So now you should have aOut vco2 p5, p4, 2, kPulsewidth. Save the file and try the synth again… oh no, we’ve broken it! Actually, we’ve changed the oscillator from the default sawtooth wave to a pulse wave, and added a controller for the pulse width. The control signal kPulsewidth isn’t defined yet, but that’s where the knob comes in.

On the synth interface that we’ve so lovingly coloured in, click the Options button, and choose “Edit-mode”. Now right-click somewhere above the keyboard that looks like a good place for a knob, and choose “Indigenous > rslider”. (Knobs are called rsliders, as if there’s not a perfectly good name for them.) Now click on the knob that appears, and you’ll see a long list of properties for it. Change the “channel” property from “rslider” to “pulsewidth”. Make the “text” say “Pulsewidth” too. Change the “value” property from 0 to 0.5. Maybe change the max and min so that they’re a bit less than 1 and a bit more than 0 - the ends of the range aren’t very useful. And I know how much you like tweaking colours, so go ahead and make it pretty. Press Esc to apply the changes. Maybe make the knob a bit bigger, so that you can read the whole of the label - you can either drag the corner of the sizing box around the knob, or change the numbers in the properties list. Turn off “Edit-mode” in the menu to return to a playable state.
So now we have a knob, but it’s not wired up. At the start of the instrument, under instr 1, add a new line: kPulsewidth chnget "pulsewidth". The name “pulsewidth” matches the “channel” property of the knob, which you may have spotted has appeared as a line of code at the top of the file. The chnget opcode converts the knob’s position to a control signal (which, as you know, has to begin with “k”).
Save that now and try playing some notes again. Move the knob and hear how the sound changes.
Push the envelope
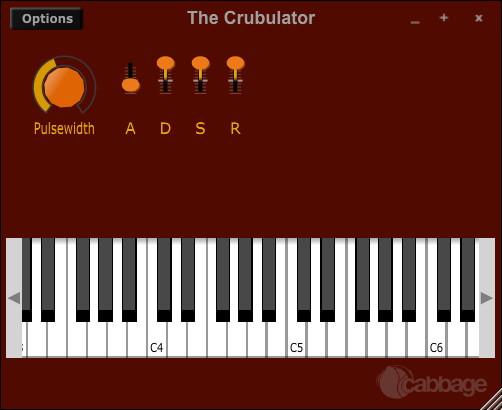
How about some sliders for that madsr? Put the synth interface back into Edit-mode and right click to add a vertical slider - that’s “Indigenous > vslider”. Set the text to “A”, the channel to “attack”, and the size and colours as you think best. The value is in seconds, so you could set the max to something greater than 1; I went for 5. According to the documentation for madsr, the minimum value is not allowed to be 0, but it can be a very small number like 0.000001.
Instead of setting up another slider from scratch, you can right-click and duplicate the A slider. Do this three times and arrange the new sliders neatly. Now set their channels to “decay”, “sustain” and “release”, and their text to “D”, “S” and “R”. The sustain value needs to be between 0 and 1, so make sure the max for the “S” slider is 1, and the value (the starting position) is something civilised like 0.6. The A, D and R sliders are all times in seconds, so they can go on beyond 1. But remember, they’re not allowed to go right down to 0.
Let’s wire those sliders up. In the code editor, add some more chnget lines:
iAttack chnget "attack"
iDecay chnget "decay"
iSustain chnget "sustain"
iRelease chnget "release"
And plug those into the madsr envelope generator:
kEnv madsr iAttack, iDecay, iSustain, iReleaseSo here’s the instrument section:
; instrument will be triggered by keyboard widget
instr 1

; get the control signals from the knobs and sliders
kPulsewidth chnget "pulsewidth"
iAttack chnget "attack"
iDecay chnget "decay"
iSustain chnget "sustain"
iRelease chnget "release"

; ADSR envelope
kEnv madsr iAttack, iDecay, iSustain, iRelease

; Pulsewidth oscillator
aOut vco2 p5, p4, 2, kPulsewidth

outs aOut*kEnv, aOut*kEnv
endinSquelch
We’ve added some knobs to the default guts of the thing, but now let’s add something new. The voltage-controlled trinity of VCO (oscillator), VCA (amplifier) and VCF (filter) needs to be completed.
Open the Csound manual (you can get to it from the Help menu in Cabbage’s source editor window, or press f1). Scroll down to the Opcodes Overview section. What a lot of goodies. Hyper Vectorial Synthesis. Waveguide Physical Modeling. Convolution and Morphing. Non-standard Spectral Processing. And it’s all free for you to play with. If you find out what it all does, write me a tutorial. Anyway, drag your clicking finger away from the sexy stuff for the moment, and find Standard Filters, under Signal Modifiers. In there, you have 18 types of resonant low-pass filter. If you don’t know what a resonant low-pass filter is, it’s the thing that’s responsible for exactly 84% of the cool bits in all electronic music. Let’s pick “moogladder”, more or less because it has a nice name.
So, back to the code editor. Let’s put the filter after the VCO.
aOsc vco2 p5, p4, 2, kPulsewidth
aOut moogladder aOsc, kCutoff, kResonance
You’re no fool. You noticed immediately that the output of vco2 is now going to a new variable called aOsc, and aOsc is going into our moogladder (from the right), and that’s going into the old aOut variable. Exactly like putting another guitar effect pedal on your board: you need another patch cable. What’s more, you’ve noticed those two new control variables, and you know what they need. More knobs.
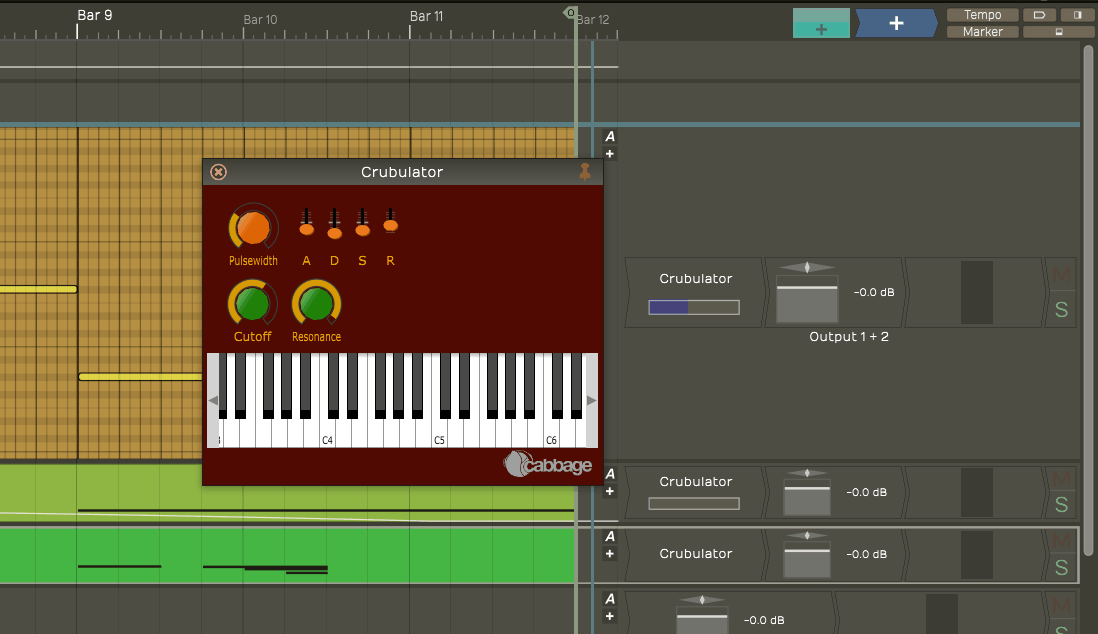
On the synth interface, go into Edit-mode again, and duplicate the Pulsewidth knob twice. The Cutoff knob needs a channel of “cutoff”, naturally, and minimum and maximum values in the audible frequency range, roughly 20 to 20,000 Hz. I chose 40 and 10240, with a default of 5120. One extra on this - set the “sliderskew” to 0.3. If you leave it at 1, the knob will seem really sensitive at low values, and not at the top. That’s because each octave doubles the frequency: the first octave goes from 40 to 80 Hz, the second from 80 to 160, and so on, up to the last from 5120 to 10240. So the top octave takes up half the dial, and seven octaves are squeezed into the lower half. If we “skew” the slider, it reacts more intuitively.
The Resonance knob needs a channel of “resonance”, and values from 0 to 1. The documentation says that you can go higher than 1, warning that “Higher than 1 resonance values might cause aliasing”. I didn’t notice aliasing as such, but it certainly made a horrible noise when I tried it.
Back out of Edit-mode, and let’s finish the wiring. Add these two to the chngets:
kCutoff chnget "cutoff"
kResonance chnget "resonance"
Try it out.
If, like me, you got a bit too enthusiastic and tried to play all the notes at once, that’s good. Some call it “smoke testing”, from the practice of running an electrical prototype at higher and higher power until something starts to smoulder. Whatever smokes first is the weak link in the design. Don’t know about yours, but my little synth develops some horrible crackly distortion if you push it, and that’s a whiff of smoke.
There are a few ways of avoiding hitting that distortion threshold. The boring one is to turn stuff down until it doesn’t distort - you could make your outs aOut*kEnv*0.5, aOut*kEnv*0.5 or so, but turning stuff down is for squares. Luckily, we have a compressor to hand, and compression is for cool people. So I’ve heard. In a nutshell, compression just makes the loud bits quieter, leaving the quiet bits alone. If we put it between the filter and the output, the envelope will still change the signal level as normal, so we won’t lose dynamic range.
This is a good starting point:
aFilt moogladder aOsc, kCutoff, kResonance
; Compressor to stop nasty digital distortion
aOut compress aFilt, aFilt, -20, 50, 60, 10, 0.0001, 0.4, 0
outs aOut*kEnv, aOut*kEnv
Do read the docs and tweak those numbers, or even add some knobs to control the compression parameters if you like.
Export strength
To use your synth outside of Cabbage, you’ll need to export it. From the Options menu, choose “Export as… Plugin Synth” and save it as a plugin to use in your DAW.
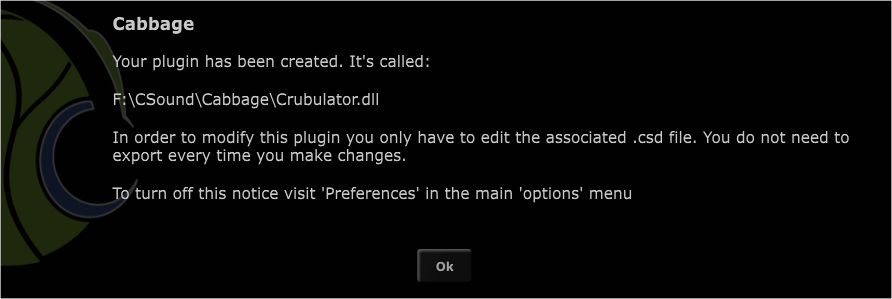
Now, put both the dll file and the csd file for your synth somewhere your DAW can find it. If you don’t have a DAW, you can get an excellent free version of Tracktion which will do nicely. Here’s our finished synth in action:
You can find out more about exporting from the Cabbage documentation.
Done.
If you want to compare your version with mine, or if you just can’t be bothered with all that typing in the first place, just go and fork it on GitHub.
Exercises
That’s just a start. Plenty more space for knobs on that little synth. If you’re looking for ideas of where to take it next, here are a few:
- Add another effect, for example
distort1,flangerorreverb - Add a control which applies varying amounts of the envelope signal to the filter cutoff
- Add more controllers - knobs, sliders, or whatever - for the spare variables in the code you’ve already got
- Add a visualisation, or otherwise make it look prettier.
(Aside: how ADSR envelopes work)